Getting Started with XNAT
Table of contents
- What is XNAT?
- Logging into XNAT
- Understanding and Navigating XNAT
- Interacting with XNAT using REST and Python
- Creating a project
Now that you’ve had a look at the data and are beginning to understand its structure, it’s time to move away from storing it locally. We will be using an open-source imaging informatics platform called XNAT to manage and facilitate analysing the data.
Your objectives are:
- Understand what XNAT is
- Login to XNAT and gain familiarity with the system
- Connect to XNAT using Python
- Create/access a project on XNAT
What is XNAT?
XNAT is an open-source imaging informatics platform developed by the Neuroinformatics Research Group at Washington University. It’s used for data management, sharing data, running analysis pipelines and more Watch the below video for an introduction to XNAT:
You may also wish to have a look at the XNAT website and the user documentation
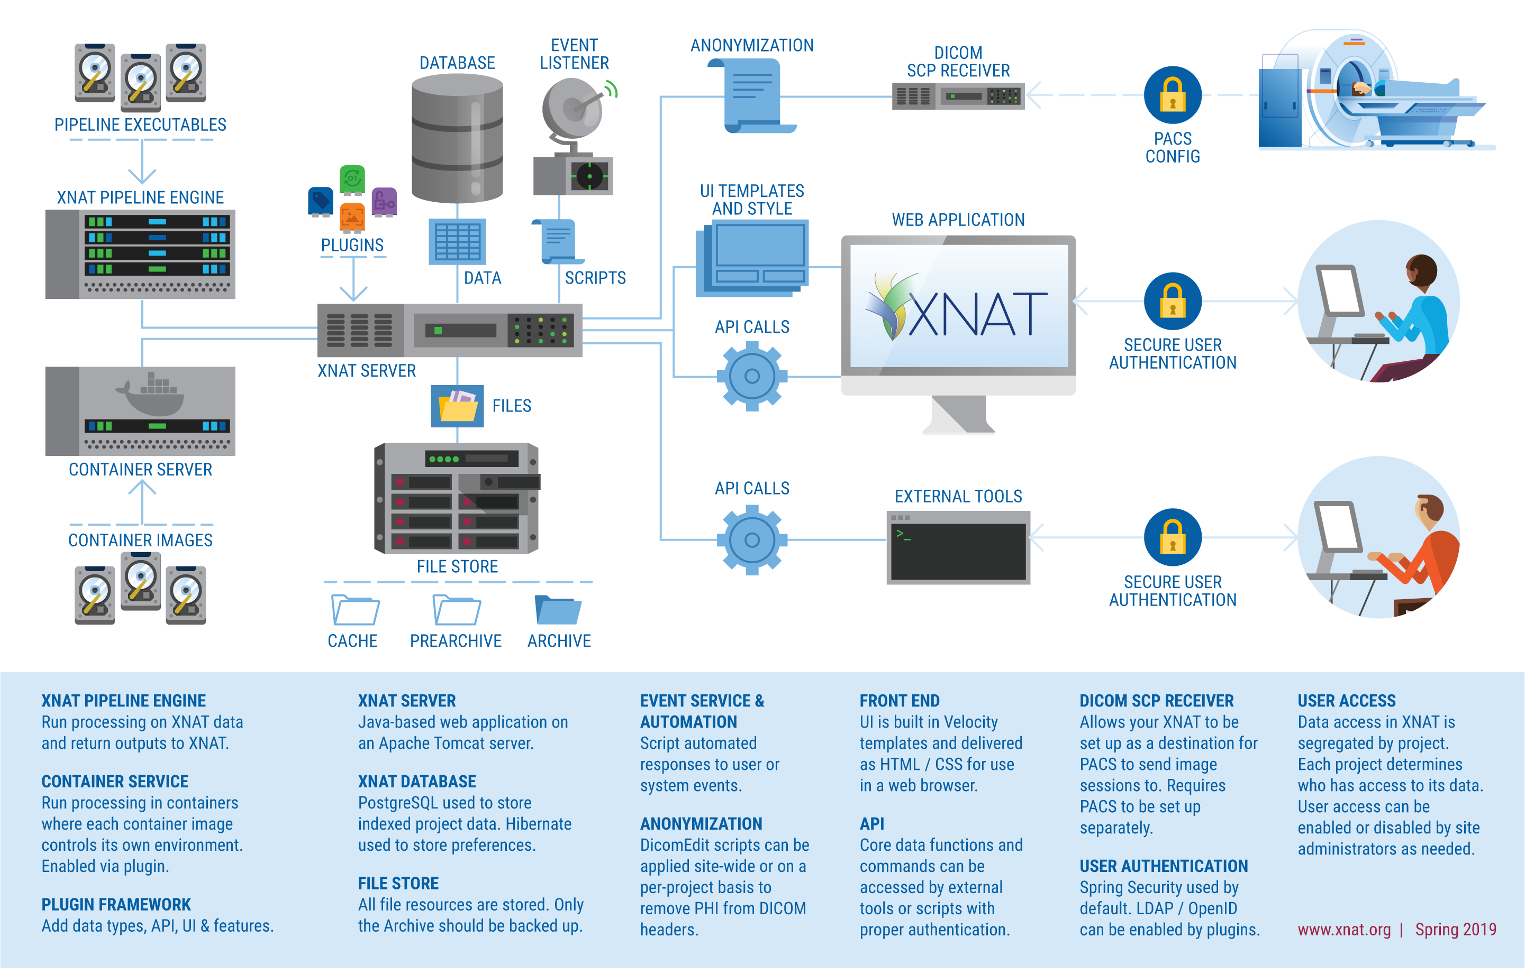
The diagram below summarises some of the technical components of XNAT.

Logging into XNAT
Most XNAT servers require username and password authentication in order to restrict access to the sensitive medical imaging data that it holds. As part of this project, you will have an account created for you to access an XNAT instance. Your account details will have been received to the email address that you signed up with. If you’ve forgotten your password, you can reset it from the login page.
Any issues, let one of the course leads know!
Understanding and Navigating XNAT
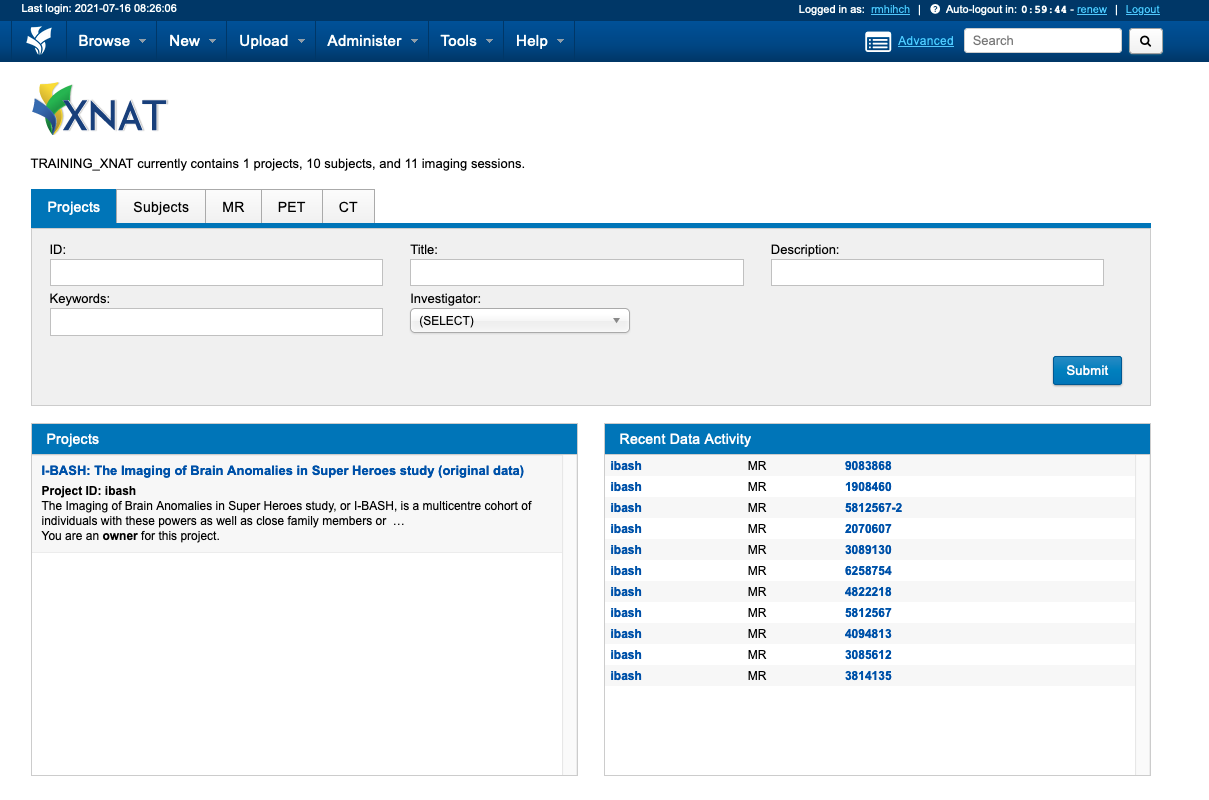
Once you’ve logged in, you’ll be able to see a list of all the project that you have access to, or can request access to.
We’ve preloaded the IBASH data as is as an example project so that you can use it to gain familiarly with the system:

Some tasks to do to get you orientated:
- Open the
ibashproject - Understand the subject list being shown
- Click on a subject to see the imaging session(s) associated with that subject
- Open a MR Session to see the image series and scans within the session
- Hover over a scan, and click the view details icon to see the DICOM header
- Use “View Images” in the “Actions” menu to open and view the images
We encourage you to have a look around and read bits of the documentation to gain an understanding of how to interact with XNAT.
In particular the video below may be useful in understanding the XNAT data model:
Interacting with XNAT using REST and Python
Logging into the web interface that XNAT provides is just one of the ways of interacting with XNAT.
XNAT exposes a REST Application Programming Interface (API) that allows you write scripts and code in order to access to all the features in XNAT programmatically. This is especially handy when you have lots of processing to do in bulk and want to automate the process. If you’re interested in learning more about this have a look at the XNAT REST API Directory and Tips for Uploading Files via REST
However, you don’t need to understand REST as libraries exist that allow you to interact with the XNAT API from Python using a language and syntax you may already be familiar with. One such library is XNATpy and you may wish to follow the tutorial to see if you can interact with XNAT from Python.
A summary of using XNATPy is as follows:
- We recommend first setting up a separate Python environment for this project. This is so that any dependencies needed for this exercise don’t interfere with any other work that you are currently doing with Python. Creating a new environment can be done many ways. Probably the easiest is to install miniconda.
- Once conda is installed you create a new environment with the new command
conda create -n xnat python=3.11 xnat - Follow the prompts and instructions it provides.
- When you are ready to use this environment, type
conda activate xnat
- Once conda is installed you create a new environment with the new command
- Import the library and connect to the server
import xnat session = xnat.connect('https://my-xnat.com',user='admin', password='secret') - Explore the XNAT server. E.g list all projects:
session.projects - Disconnect when done
session.disconnect()
Creating a project
Projects are the highest level hierarchy in XNAT and the level at which permissions and access are controlled. We’ll now create a project to use for any future work that you’ll be doing on XNAT.
Usually, to do this from the website:
- Click “New” –> “Project” from the top menu
- Fill in the project details with some sensible information for the project title and running title
- For the project ID, enter a value in the form of
ibash-YOUR-NAME - Set the Project Accessibility to “Private”
- Click on the button at the bottom labelled Create Project
For an added challenge, you can try accessing your project using XNATPy and Python.